How to Properly Replace a Pool Pump: A Step-by-Step Guide
Replacing a pool pump can seem complex, but a systematic approach can make it manageable. Here's a guide to do it correctly and ensure optimal pool maintenance.
If you’ve returned from a vacation to find your pool looking more like a swamp than a backyard oasis, the problem might be your pool pump. As the heartbeat of your pool’s circulation system, a malfunctioning pump can disrupt the entire filtration process, leading to stagnant and unsightly water. While replacing a pool pump may sound complex, the process is entirely manageable with the right tools and a systematic approach. Here’s a comprehensive guide on how to replace your pool pump properly and get your pool back in pristine condition.
Diagnosing the Problem
Every pool pump has a finite lifespan, and signs of failure can include loud humming noises, inconsistent water circulation, or a complete shutdown. Before diving into the replacement process, verify that the issue lies with the pump itself. If it’s no longer operational, follow these detailed steps to safely remove and replace it.
Safety First: Disconnecting Power
The first and most critical step in replacing your pool pump is to ensure your safety by disconnecting power to the pump. Turn off the circuit at the electrical panel to eliminate any risk of electric shock. Once the power is off, access the back of the pump to verify that there's no current running by using a voltage tester.
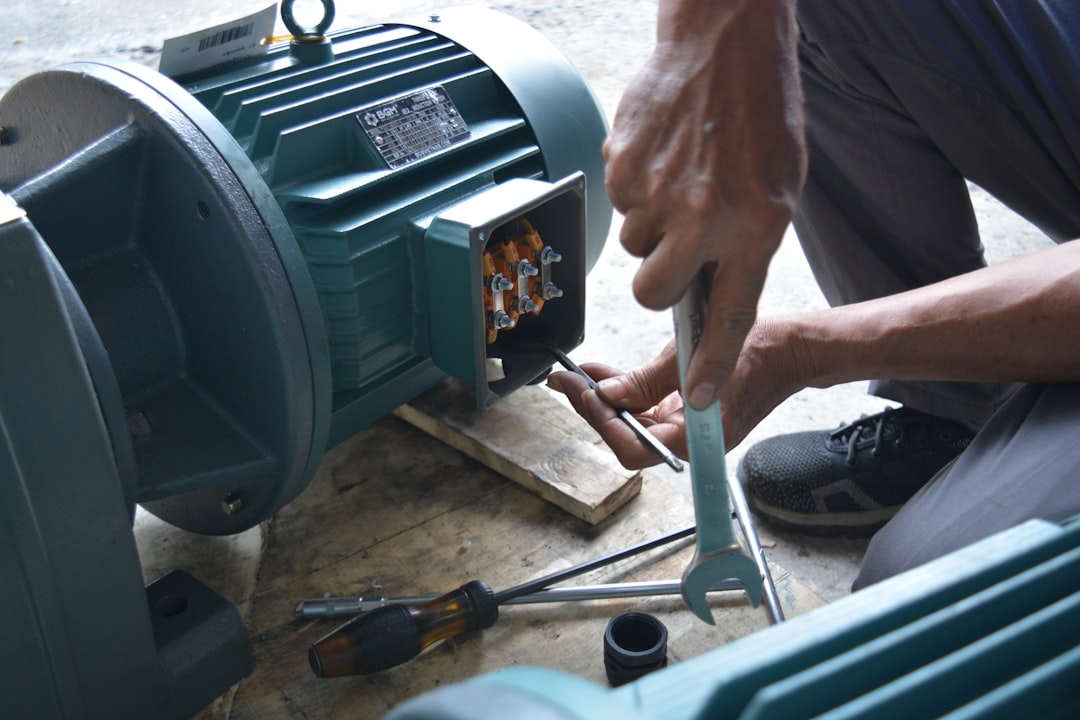
Removing Electrical Connections
With the power disabled, begin by disconnecting the electrical wires. Unscrew and remove the ground wire first, followed by the two hot wires (L1 and L2). Carefully pull these wires out of their conduit, and make note of their placement to simplify reconnection later.
Detaching the Pump
Next, tackle the plumbing connections. Start by closing the valves leading to and from the pump to minimize water spillage. Use a PVC pipe cutter to sever the existing pipes close to the pump. Be cautious and precise when removing any glued sections to avoid damaging other components, like the valves. If a segment of PVC pipe is stubbornly glued into place, use a two-step process:
- Cut two slots into the PVC pipe without cutting into the valve.
- Apply heat with a heat gun to soften the material, making it easier to extract using pliers.
This method ensures the valves remain intact and eliminates the need for costly replacements. Once the pump is detached, you can safely move it out of the workspace.
Installing the New Pump
With the old pump removed, it’s time to install the replacement pump. Begin by positioning the new pump farther from the valve to allow for a straight section of pipe. This improves water flow and minimizes turbulence in the system, which is essential for long-term efficiency.
Connecting the Plumbing
Prepare the PVC connections using a purple primer to clean and condition the surfaces. Apply PVC cement to the primed areas, ensuring an even coating on both the valve and the pipe. Fit the PVC pipe into the valve, pushing and twisting it to create a secure, leak-free seal. Give it around 15 minutes to dry before proceeding.
Once the main pipe is secured, insert a gasket to seal any gaps and tighten the collar to create a water-tight fit. If needed, use rubber shims to level the pump and reduce vibrations during operation. Finally, connect any additional pipes using the same process, double-checking for a snug fit.
Wiring the New Pump
Reattach the electrical connections by securing the ground wire first. Connect the hot wires to their respective terminals (L1 and L2). This step is straightforward since the order doesn’t matter, but every connection must be tightened securely. Once wired, close the back cover to protect the electrical components.
Testing and Final Checks
After completing the plumbing and wiring, it’s time to test the system. Begin by reopening the water valves and adding water to the pump to prime it, preventing the motor from running dry. Turn the circuit breaker back on and then power up the pump.
Let the pump run and observe its operation. Check for any leaks around the connections, ensuring no water is dripping. If everything looks good, monitor your pump over the next few hours to confirm it’s functioning efficiently. It typically takes a few days for a pool to return to its clear and clean state.
Maintenance Tips
Replacing your pump is just one aspect of pool maintenance. Regular testing of pool chemistry, timely cleaning of the filter, and routine inspections of the pump can extend its lifespan and keep your pool looking its best.
Replacing a pool pump isn’t necessarily a task reserved for professionals. With careful steps and attention to detail, you can save money, troubleshoot issues directly, and ensure your pool remains the centerpiece of your backyard. Following these guidelines, you can tackle the project with confidence, resulting in a fully restored and properly functioning pool system.
Staff Writer
Nina writes about new car models, EV infrastructure, and transportation policy.
Comments
Loading comments…


